Essential Settings
Once you have successfully created your shop, and can begin setting up the application to handle online appointment booking, messaging, and many other features. This page details the first settings and options that you need to update to get your shop started on the right foot.
In this article
Settings Page
Availability Settings
Services and Packages
Custom Branding
Online Booking Forms
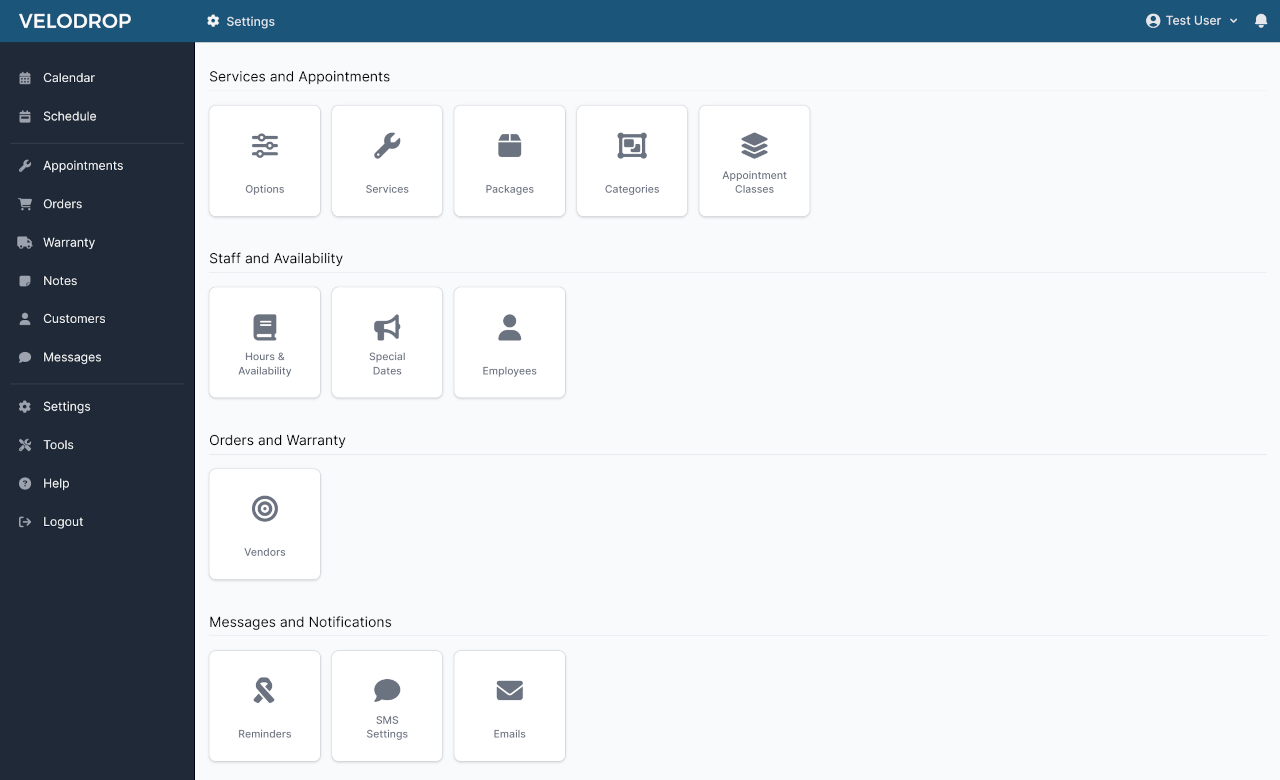
Settings Page
Most settings and customizations are accessed from the settings page. To navigate to this page, simply find and click the link labelled Settings in the sidebar menu.
https://app.velodrop.com/admin/settings
Availability Settings
Before it will be possible to book any appointments for your shop, you will need to update your shop's availability.
The common settings affecting your shop's availability are:
- Your shops hours of operation.
- The number of appointments allowed to be booked for a given date.
- The number of employee work hours available for a given date.
Hours & Availability
From the settings page, click on the button labelled Hours & Availability.
Shop Hours
To properly manage appointment booking, you must first set your shop's default hours of operation. Appointments can not be booked on days where your shop is marked as closed. The hours entered here serve as default. Once set, you can adjust hours for specific dates on an individual basis at any time from the special dates page.
Limit Bookings
To prevent any appointments from being booked before you are ready, bookings are disabled by default. To enable booking, set a default limit of bookings available for each day of the week that you are open. This will the maximum amount of appointments booked for that day of the week unless otherwise overridden.
Creating & Scheduling Employees
When you registered, an account was created with the role “owner“. This the account to which your shop and it’s employees all belong, and is the only account which may edit some important shop settings.
An employee was also created with the role “technician“. Technicians represent employees who’s schedule is devoted to fulfilling appointments.
Employees are created as secondary accounts that have the ability to safely login with limited access and fulfill common shop tasks.
You should create an employee for each technician in your shop and update each employee schedule with their default work hours.
If the primary account owner is not going to be fulfilling appointments, you should then set your employee role to “other“.
To create and edit employees from the settings page, find and click the button labelled Employees
https://app.velodrop.com/admin/settings/employees
Services And Packages
Though not technically required, you’ll most likely want to have customers select from a list of available services when booking an appointment. This will allow you to enable other features, such as automated work-load based time management, and providing limited quotes to customers during booking.
Services
To create a new service:
- From the settings page, find and click the button labelled Services.
- Give your service a name and description
- Enter a value for the estimated cost, and a value representing the expected number of minutes for a technician to complete the service.
- Choose which forms this service will appear in
- Select which days of the week this service should be available
Packages
Packages are a collection of services, so you will need to have already created some services before you can create a package. Creating a new package is just like creating a service, with the added step of selecting existing services to include with in it. This provides a great visual indicator of what level of service is being offered when a user selects a package in the booking form.
https://app.velodrop.com/admin/settings/packages
Custom Branding
You can customize your Velodrop shop by uploading a logo and background image to be used in online booking forms and printed tags.
To upload a logo
- From the Settings page, find and click the button Public Booking Page.
- Find the Logo field in the section titled Uploads
- Choose a file to upload from your computer, then click the Save button.
- Supported file types: PNG, JPG
- Maximum file size: 1MB
To upload a background
- From the Settings page, find and click the button Public Booking Page.
- Find the Background field in the section titled Uploads
- Choose a file to upload from your computer, then click the Save button.
- Supported file types: PNG, JPG
- Maximum file size: 1MB
Online Booking Forms
Velodrop provides several ways for customers to book their own appointments at your shop online.
- A unique customizable public online booking form that you can link to from your website or social media accounts. Preview and customize this page from the Settings page by clicking the button labelled Public Booking Page.
- A simple widget that can be embedded in your website that will allow customers to book their appointment from a website that you already own. Preview and customize this page from the Settings page by clicking the button labelled Booking Widgets.
Related articles